Monday, March 4, 2013

Fudge

I have yet to see a tutorial on Pintrest like this. I love this recipe for fudge, it is simple, quick and tasty. At my house we lick the spatula, mixer paddle and bowl. Warning: This fudge is addicting! You will want to make several different batches and your friends and family will beg for you to make them more after you give them some as a gift.

Fudge
Ingredients:
1/4 c Butter
2 1/2 c Sugar
2/3 c Evaporated Milk
10-12 oz Chocolate Chips
6-7oz Marshmallow Cream
1 tsp Vanilla
1 c Walnuts (opt)

1. Line a 9x9 pan with aluminum foil and spray with cooking spray.
2. Pace Chocolate Chips, Vanilla, and Nuts(opt) in mixer bowl.
3. Put Butter and Evaporated Milk in pan. Melt Butter.


4. Add sugar. Make sure to stir constantly to avoid burning. Bring to a rolling boil.


5. Add Marshmallow Cream, bring back to a rolling boil. Boil 5 minutes.


This is the color that the marshmallow mix should look like.
If you get brown flecks, turn down the heat.
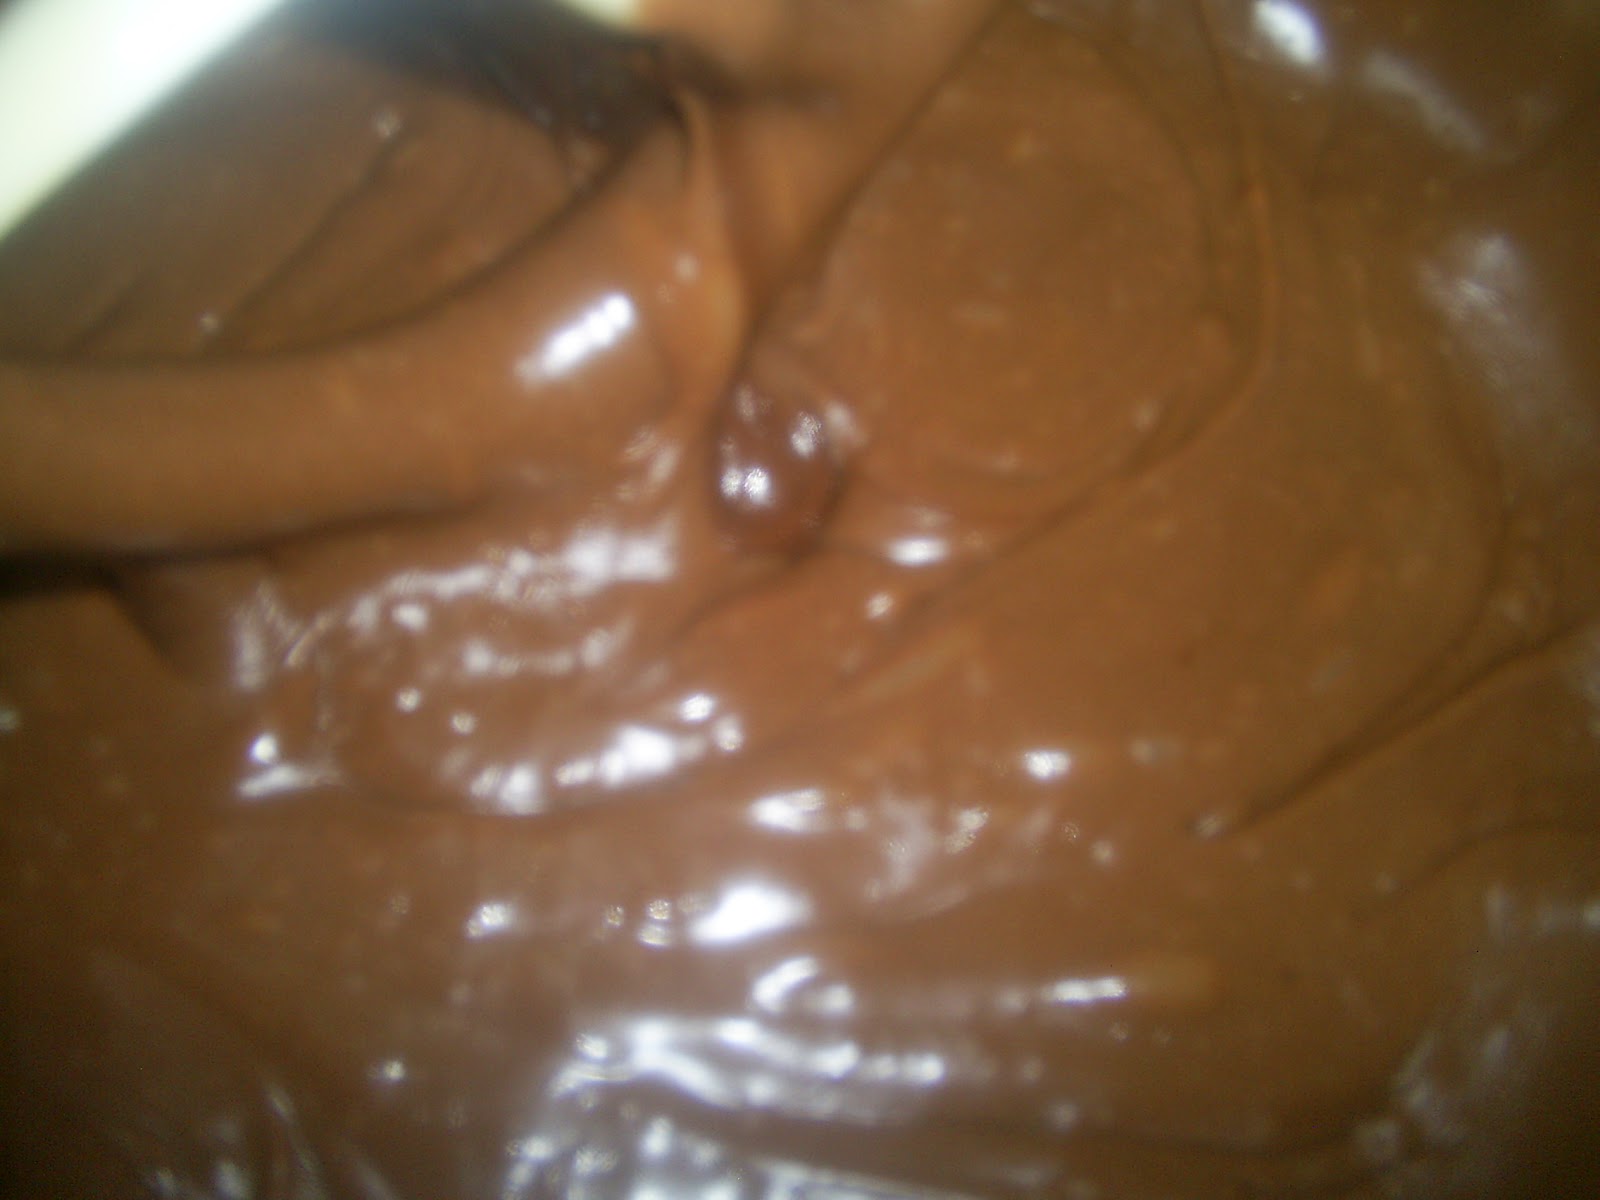
Do NOT scrape the sides and bottom.
 
 
This is what the bottom of the pan looks like, and why you don't scrape the pan ever!
And yes this will be left over after you dump out the marshmallow mix.
It looks like a waste, but will keep the fudge creamy.
 
6. Pour Marshmallow Mix over Chocolate Mix. Stir just long enough to make sure everything is Incorporated and smooth. I always stir the fudge with a spatula before I pour it into a pan.
 
7. Pour into prepared pan. You can and I do suggest scraping the mixer bowl.
 

8. Let sit a room temperature to cool.
9. Cut and enjoy!
 
Chocolate Walnut
 
Peanut Butter Cup Fudge


Variations on a Theme
Replace the Chocolate Chips with different flavor chips such as:
Butterscotch
Peanut Butter
White Chocolate
Mint Chips
Cherry Chips
Kool-Aid Fudge
Use White Chips instead of Chocolate Chips and add Kool-Aid to the chips mix.
I hope you enjoy this recipe. I know your friends and family will.  


Apricot Pineapple Jam

I hope this helps you in your quest for delicious homemade goods. ♥

Apricot Pineapple Jam~ Courtesy of Aunt Linda

4 cups mashed Apricots

1 cup Pineapple

1 Box of Pectin

Sugar, Butter, and Lemon Juice asked for in the Pectin instructions

Add fruit, pectin, butter, and lemon juice in to a stock pot. Bring to a rolling boil and add sugar.

Bring back to a rolling boil and boil typically for 1 minute. Ladle into sterilized canning jars and process for 10 minutes, adding time for altitude. I had to process mine for 25 (I'm at 6,100+ feet). Fetch jars our of the water bath canner and let sit for 24 hours.

Letting the jars sit for 24 hours has nothing to do with the jam its self, but the lids. Go ahead go get a lid, I'll wait. If you have the nice shinny side up flip it over. There should be the white bottom and a rubber ring. Letting the jars sit for 24 hours insures that the rubber ring, that was warm and sticky while your boiled it in the canner, sticks its self to the jar.

Applesauce Muffins


1 1/2 cups Applesauce
1 box Yellow or White Cake mix
Dash of Cinnamon (opt)
Dash of Cloves (opt)

Preheat oven to 350ยบ F.
Line cupcake pan with with liners or grease pan.
Mix Applesauce, Cake mix and Spices together.
Fill cupcake pan.
Bake for 15-20 minutes.

Makes 1 dozen regular + 9 mini Muffins

Done!

I always make mini muffins for the little guys around here. They love them, partly because they can run and play while eating. I like them to they are a perfect dessert with lunch.

Want to make different flavor? Simply substitute any pureed fruit or veggie for the applesauce. You may have to add up to another 1/2 cup of puree because of how dense the fruit is. Same goes for the cake mix it can be substituted for chocolate, or spice.

Click here for the original recipe.

Buttermilk Rolls

I found this recipe on the back of a Red Star Yeast Packet. I love it! These rolls are fluffy, savory, and just amazing. Get your bread machine ready!

1 c Buttermilk
1/4 c Water
1/4 Vegetable Oil
2 T Sugar
1 t Salt
1/2 t Baking Soda
3 c Flour
1 pkg Yeast

1. Bring all ingredients to room temperature.
2. Place ingredients in the Bread Machine in the order given making sure that the Yeast is the top layer.
3. Select Dough Cycle. Do not use a delay timer, the Buttermilk could go bad.
4. When cycle is complete remove dough and press evenly into greased 9-inch square pan.
5. With a knife cut dough into 12 rolls cutting almost to the bottom of pan.
6. Sprinkle top of dough lightly with flour.
7. Cover; let rise in warm place until indentation remains after touching (about 20 to 30 minutes)
8. Bake in preheated 400°F oven for 15 to 20 minutes until golden brow.
9. Remove from pan.
10. Break apart into rolls; serve warm.

Elizabeth's Way~
I always use cold Buttermilk, letting it warm up just seems wrong.
Instead of 12 rolls I only make 9. They make the best sandwich rolls that way.
After the rolls have risen in the pan I dust off the flour and brush butter on the top. It give the rolls a bakery gloss that just can't be beat.
Add a packet of Italian Dressing mix after the flour for a twist on this classic. In fact you can add ranch or onion dip mix for 2 more different flavor combinations. More often then not I add a dip mix.

Happy Baking!